Table of Contents
Select the Garden Site
It is often said about real estate but is true for garden design as well: location matters. Selecting the right garden site results in better per-plant aesthetic value. It also increases the odds of the physical garden's success. A layout might look perfect, but if the plants don't get the right sun exposure or shade, they'll keep dying.
The factors you need to consider when opting for a garden site include sunlight, water source, visibility, and surrounding accents. Even if a client has already assigned you a location, you must think about these aspects. If something in the brief is not optimal for the garden, you should approach the client and discuss it. Sometimes, you can offset location issues with the site-specific plant selection.
Here is what you must look for in each location feature:
- Sunlight - Ideally, a sizeable area of the garden should have full-sun exposure, with some sections having partial sunlight. Err on the side of sunlight because you can always erect a shade source where required.
- Water source - This is not as much of an issue now as it used to be when the garden design profession was in its infancy. Now you simply need to consider drainage proportionate to the water source and plant demands.
- Visibility - One of the essential considerations for any garden layout is its visibility. You should make sure the location has the maximum horizontal and aerial visibility so that you can design a garden that looks beautiful from the ground as well as the rooftop.
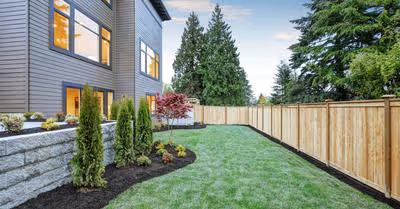
- Surrounding Accents - Finally, you need to ensure that the areas surrounding the plants don't upstage your garden. The garden should fit the pre-existing architecture yet should stand out enough to receive solo praise.
Site selection mistakes
- With the Dos of picking the garden/planting site out of the way, let's look at some of the easy-to-make mistakes that can affect your design adversely.
- Not being plant-specific - Your garden layout can suffer if you consider the garden's location overall without having a broad idea of which kind of plants would go where. Later down the line, you might discover that there is no room for tall flora or that walls are making it impossible for smaller shrubs to get their shine.
- Not considering weatherproofing - The location of different flowerbeds should be such that strong winds and heavy rain don't destroy them. For this, you should position them where a wall or some other vertical structure shields them. The closer a flowerbed or plant is to a man-made structure, the easier it is to throw an umbrella shade over it.
- Being exclusively visual - The last thing that makes for a poor garden layout is an exclusive focus on the appearance of the garden. As long as the plants and flowers aren't artificial, you cannot prioritize the appearance of the garden over its practicality. Gardens require maintenance, and the tougher they are to maintain, the less likely they are to last.
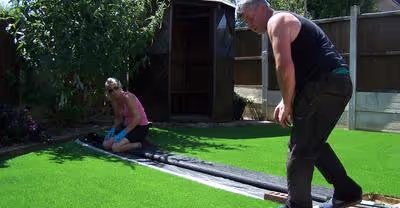
Measure the Area and Shape
After you have selected the garden site, including the location of specific types of plants, bushes, and beds, you need to measure the area. You should record your measurements in both feet and inches because inaccuracies occur with down-the-line calculations.
The measurements in feet will help you judge relative positioning from the property, the ideal distance between plants, and the items you need to buy for edging. The inch measurements are helpful when ordering flower pots and smaller items.
Next, you must convert the measurements to a scale that can be translated to the layout. Your garden layout will not be as big as the garden itself, which means the miniature version that goes in your portfolio and to your client must have a reliable scale that can be converted to a full-scale execution.
There is no mandatory chain of events between physical measurement on-site and design outline on paper. In some cases, the location of the garden is decided by the client, and you have to measure the area first on-site, then go to the drawing board.
In other instances, you don't have access to the site, but the client sends you a copy of the architectural layout with measurements. In that case, the total area measurement is converted to a smaller scale and put on paper, giving you a canvas to work within when mapping your layout. Here is how you would proceed in each instance.
How to Measure the Garden Site Yourself:
1. Mark a starting point
2. Place a 3-foot rule with one end touching the starting point
3. Flip the ruler lengthwise while counting the flips
4. Stop when the ruler cannot be flipped without getting outside the boundary
5. Multiply the total flips by 3 to get the exact length in feet.
6. Measure the rest of the length in inches
Useful Tools for Measuring the Site
The two tools with the highest utility in site measurement are an online measurement convertor and a 3-foot ruler. These will help you take length and breadth measurements and convert them as required by your garden design work.
Robert Larson Co. 3-foot ruler is the ideal 3-foot ruler for bootstrapping garden designers because it can be folded, which makes it highly portable. Singer inch-tape comes in handy to measure smaller areas. And the Inch calculator can be used to convert feet and inch readings to a single unit like inches, meters, etc. Length and width need to be in single units to calculate the total area.
How to Use the Measurements Given by a Client
1. Set a drawing area on your layout sheet
2. Measure the length of the drawing area in inches
3. Take the total length measurement from the client's brief
4. Divide the length given by the client with the drawing area measurement
5. This is the scale of what real-life length each inch on paper represents
Let's suppose you receive an assignment to create a garden layout for a 2500 square feet garden. The client sends you the measurements where one side of the garden area is 700 feet long. When you sit with your sheet and map out the drawing area, one side measures 24 inches. You must divide the higher number, the real-life length, with the lower number (the drawing length). 700/24 equals 29.166.
Mathematically, you would round that up to 29.2, but because in real life, it is best to have a garden within the defined boundaries, you must round down all measurements to one decimal point. This brings us to the conclusion that one inch must represent 29.1 feet.
To avoid confusion, make sure that you do this process with the longest one-dimension measurement of the actual site and the longest side of the drawing area. Otherwise, you would end up with more to draw than the space on your paper.
Brainstorm the Design
This is the stage where you can start looking at ideas. Pinterest is an excellent resource to get inspired. The 'pin' feature on the site allows you to collect ideas. To make sure you don't copy another design, look at a large variety of gardens. Here are some good search terms for Pinterest garden inspiration.
- Geometric Garden - Geometry makes a garden's aerial view look amazing. If your client's house has a clear rooftop view and at least three levels, then including geometric gardening inspiration in your garden layout is a must.
- Plant patterns - Patterns have a great visual effect on observers on the ground. Since most gardens are observed up close and in person, getting some pattern, contrast, and parallel planting inspiration is a must for every garden designer.
- Flower rows - Planting flowers in a row doesn't require creativity, so there's no inspiration regarding the rows themselves, but the plants you'll see in the Pinterest pictures will likely feature interesting color contrast.
- Bricks and plants - Aside from looking at how the flowers play off each other, you should consider their relation to other materials in the garden. Looking up terms like 'bricks and plants' or 'plants and marble' can help you come up with ideas that complement the actual location.
- Small landscaping - Regardless of the space allowed by the brief, looking at how gardeners and garden designers push the boundaries of small-scale landscaping can get your creative juices flowing.
- DIY landscaping - Even professional garden designers can be thoroughly inspired by the ideas executed by amateurs. DIY landscaping pictures often feature easy-to-set arrangements, which can also help you come up with creative solutions for obstacles you might face on the practical front.
- DIY garden design - Finally, looking at DIY content from people within your own field can inspire you to flip ideas and come up with new ways to approach garden design classics.
You can also look at landscape photography from sites like Pexels and Unsplash to get inspired. On photography sites, looking for specific types of plants can assist the creative process and help you gather materials for your mood board.
Remember, brainstorming is a boundary-less process, so it is best not to confine yourself too much and disregard the measurements and specifications initially. Once you are thoroughly inspired, you should start organizing your ideas on a mood board.
Gather Your Ideas in a Moodboard
After collecting inspirational material, it is time to consider the brief and its boundaries. Take a notepad and jot down any creative ideas you have had from the materials you've collected. Next, take images and ideas that you want to replicate in your garden without significant alteration and pin them on your mood board.
This can be done physically with printouts and thumbtacks but can also be done digitally. Canva is a great website to create mood boards online. It allows you to collapse ideas into specific subheadings so your board doesn't result in brain scatter.
There is no right or wrong way to organize a mood board. As long as the result is that it grounds you in a theme you want to pursue, it does its job. Once you're satisfied with the board, it is time to reconcile it with the brief. The interaction between your mood board and the brief is your garden layout.
Create a Garden Blueprint Boundary
Now that you have the exact boundaries to work within (brief) and a treasure trove of ideas (mood board), you can start designing on paper. While the creative aspect of designing builds from the inside out, the layout process goes from the outside to the inside. In other words, instead of letting an idea define what goes on paper (as is the case with the mood board), you must let the brief pinpoint what goes on paper.
The outer-most aspect of a garden blueprint is the boundary of the garden. So, you start by drawing a to-scale boundary in the exact shape of the garden. It helps to put a key on the layout, so you don't miscalculate anything. Here are a few ways to include a key:
- 1":12ft - This shows that each inch on paper translates to 12 feet.
- 1 in: 8 ft - This indicates that each inch on the layout translates to 8 feet on paper.
- Inch x 9 = feet - This shows that each inch needs to be multiplied by 9 to get the exact feet measurement (i.e., each inch translates to 9 feet).
- Key | Inches to feet | 1:12 - This key is quite literal in describing that to get feet measurement from the inches in the drawing, one must consider each inch as the equivalent of 12 inches.
Create Plant Space Boundaries
The next step is to pick out the space for different types of plants. Where do the succulents go? Is there a rosebed? Are there trees in the garden? Specifying where groups of plants and specific bushes and vines go is the point of plant space boundaries. Remember to consider the horizontal and vertical appeal of different plants, their arrangements, and how they interact with each other and the space around them.
You must be geometric in translating your ideas to paper. If there's going to be a long row of agave plants, draw a rectangle to identify it. If a rose bush will be trimmed into a circle, draw a circle on the paper in the exact position relative to the other boundaries.
Create Landscaping and Accent Boundaries
From red brick walkways to white gravel boundaries, plenty of hardscaping aspects are essential to an impressive garden. If your garden features plants only, it can resemble a jungle without proper landscaping accents. As a garden designer, you are not confined to ideation around plants and flowers only. You can use icons and drawings to represent different accents, edging materials, and boundaries.
Select Plants and Assign Them Space Within Their Respective Boundaries
Finally, it is time to get very specific about the plants in your garden layout. While different flower and plant types are already assigned their space within your layout, now is the time to draw and label the exact plants. Flowerbeds, vines, palms, bushes, and grass cover are all categories, but for a layout, you need to also add the exact botanicals to place in each space.
Roses, grapevine, a date palm, hibiscus, and lawngrass are examples of specific garden botanicals in each category covered earlier. Once you have labeled the garden layout appropriately, it is ready to send to the client. If you're designing the garden for yourself, then it is time to get to work. Either way, knowing the planting and nurturing of different botanicals comes in handy.
Final Thoughts
A garden layout is an excellent tool to guide the process of creating a garden from scratch. Whether you design a garden for yourself, a friend, or a client, the layout process must adhere to a few rules. You must find the ideal location, measure it properly, and assign specific areas for plants and flowers of your choice while considering hardscaping opportunities.
Recent Articles