Table of Contents
7 Principles of Landscape Design for Residential DIYers
Generally, there are five landscape design principles. But I have incorporated three more into the mix that I believe home gardeners should also follow. So, here are my seven landscape design principles for DIY home landscapers:
1. Colors
If you were putting a fresh coat of paint on your home, would the color matter? Of course, it would! So, it should matter when it comes to your greenery. A landscape with nothing but green plants can look quite amazing. But adding a little color can take the look to awesome heights.
However, you don’t want to get out of control. Too many different colors might be overwhelming to the eyes. The colors you choose for your softscape should complement the color of the most dominant feature on the property… your home. They should also complement each other while creating contrast at the same time.
Personally, I just went through this over the past week. I wanted a bunch of purple flowers in my front beds. So, I picked up some at Home Depot. The next day, I realized it was just too much purple. I needed to break it up with some white and pink flowers. So, back to The Depot I went to grab some Impatiens and Petunias.
2. Forms
Trees, shrubs, flowers and plants come in many different forms, each providing the landscape with its own uniqueness. From tall and lanky to short and bushy… form matters. You wouldn’t want to plant squash where a large tree would block the sunlight. The tree would thrive but the squash wouldn’t.
Always pay attention to the potential form of the plants at maturity. Do your research to find out how wide and tall it gets. Then, make sure to plant shorter plants where taller ones won’t shade them out. Also, make sure bushier plants have enough space to spread out the way they want.
3. Lines
In the landscaping arena, lines are used to separate one area of your garden from the next. They are also meant to pull your eyes toward a specific focal point. This could be a patio set, canopy, tree or anything you choose.
Garden lines don’t always have to be straight either. As a matter of fact, curved lines give the landscape character. Have fun as you establish the lines around your beds. Then, do the same with the rest of the yard.
4. Textures
Every flower, stem and leaf has texture. Just like with color, you want plants that complement one another while providing that perfect balance of contrast. Whether you go with annuals or perennials, keep the texture of the foliage in mind.
5. Go Big
When it doubt… just go big! If you have enough room for an Olympic-sized swimming pool, why install a small one? Have enough space along the fence for a 10-foot-long bed, why are you building them at 5-feet long?
If we were homeowners instead of tenants, I would build a gazebo in my yard and grow beautiful purple flowers all around it. That place would be my little purple sanctuary. But since I can’t, I’ll just install some cattle panel in the garden and shape it like an arbor. Then, grow plants up and over it.
Why am I telling you this? Because I believe in going big. I want a hardscape in my yard that says, “I am the star. Stand under me. I have functions. I act as a trellis to plants and I provide shade in the garden!”
6. Mass Planting
Ever seen a landscape with a slew of the same plants growing in a particular space? It’s a very striking look when one variety is planted in quantities.
What is mass planting? It’s the process of filling in areas of the landscape with groups of flowers of one or more variety of plants. Planting in mass groups is much more visually appealing than planting flowers in straight rows.
This planting style creates drama and captures attention while adding pops of color to a specific area of the garden. Mass planting also helps reduce the growth of weeds, which is always good news for a gardener to hear.
7. Cardboard Is Key
I cannot stress this enough to gardeners, both old and new. Cardboard is key to success when starting a new flower bed or garden bed.
Why Tilling Is Useless
Last year, we tilled two in-ground beds to start my own garden. Today, I now have nine beds altogether. Guess which two have the crappiest soil on the property…0
Yes, you guessed it… the two we tilled. So, when it came time to amend one of them this spring, I went with cardboard, like I did Beds 3-9. The other one is resting. But she’ll be getting cardboard soon as well.
When people debate with me about the idea of ‘to till or not to till,” I explain it to them like this: If your soil is obviously crappy on the top, why do you think flipping it over like a pancake will fix that? The soil is crappy on the other side too. Think about it.
If you stand by tilling, please check out the Netflix documentary, Kiss the Ground. Tilling is literally bad for your soil and the environment as a whole. It’s always best to give back to the earth than to disturb it.
Benefits of Cardboard in the Garden
I guess you’re wondering, “What do I do with cardboard in my garden?” Well, you layer it on your crappy soil and on that grass you’re trying to kill off. These are just some of the reasons I find cardboard to be so amazing:
- Weed Control – Organically suppresses weeds. Remember that anything that comes from the earth is good for the earth. Cardboard is organic, as long as it’s not the shiny kind.
- Grass Killer – Smothers grass so you can create a new garden bed. Why break your back tilling to remove grass when you can just lay cardboard?
- Earthworms – All gardens need earthworms to thrive. They poop in your soil, creating organic matter. These little critters are very attracted to cardboard.
- Compost – Over time and with the help of the earthworms, cardboard breaks down and becomes more organic matter for the soil. It’s essentially compost.
Planning Your Landscape on Paper
This is a very important step that DIY landscapers should never skip. When I started my garden, it was a reaction to the empty stores during the madness of 2020. So, my panic caused me to just grab a shovel, till some patches of dirt and start dropping seeds.
Today, I have no regrets. But had I planned my landscape better, there are so many things I would have done differently.
For one, I placed my raised beds in a way that doesn’t allow us to open the fence if we ever find a handyperson to create an opening in it. Second, I would have made the walkway in between the beds wider so I could place a birdbath there to keep the birds from eating my tomatoes to quench their thirst.
So, pull out some colored pencils and paper and create a rough sketch of your property. Be sure to include:
- House – Add this first.
- Boundaries – Fences, neighboring houses…
- Sun – Where does it rise and set and are there hours of shade in specific areas?
- Outdoor Living Spaces – Outdoor kitchen, patio, deck…
- Utilities – We have two A/C units in our backyard.
- Features – Gazebo, fire pit…
- Privacy Issues – IE, a fence between you and neighbor too low.
- Existing Plants – Never forget about them.
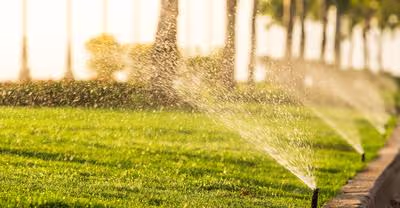
- Irrigation – Where do you hook up the hose?
- Miscellaneous – Trash cans, sheds…
9 DIY Landscape Design Tips
Once your sketch of the property is complete, you can use it to add new aspects to the landscape. Use a different color pencil to draw in your plans for new raised beds, gardening areas, a patio set, canopy or whatever your heart desires.
Still don’t know where to start? Well, ask yourself, “What are my priorities for my yard?” Think about your number one goal for your outdoor space. For me, it’s to grow my own food so I know what my family is eating every day.
For you, it may be to have a place for the kids to play. Or maybe you’ve always dreamed of entertaining friends in your yard. Or maybe you just want a place to ‘chillax’ and enjoy a beautiful view. Once you determine your top priorities, it will be much easier to fill in the blanks on your sketch.
With all that said, here are nine DIY landscaping tips to help you bring your sketch to life:
1. Create Visual Impact – Layer plants so that the larger ones are in the back. Create drama by layering the heights so the smaller plants are in the front. You can also curve the bed’s edges to make it more appealing.
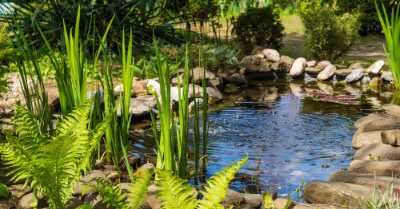
2. Add Rocks – Is there an area in your yard that’s too awkward to mow? You just can’t seem to get the lawnmower in there good enough to get the job done right? Just fill it in with rocks. Mowing issues gone.
3. Create a Berm – What’s a berm? It’s essentially a linear, rounded mound of soil dramatically placed in a flat yard. Berms have their functional reasons. But aesthetically, they add a dramatic look to any landscape. Picture the mounds on a golf course.
4. Grow Up Trellises – Can’t or don’t want to grow trees in your yard, but want something with a similar appeal? Slap some trellises in your beds and grow climbers up them. Sweet peas range in colors from blue to salmon to pale pink to white. And they have a nice scent too.
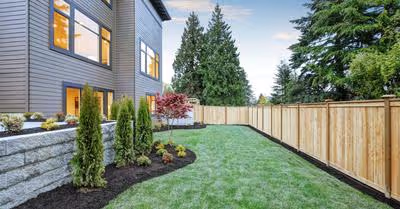
5. Create Edges – The edges around your beds, along your lawn and walkways and around your trees should be distinct. They should separate one area of the landscape from the next. This can be done using edging material, rocks, bricks, pavers, even plants.
6. Ground Covers – There’s nothing like a patch of colorful ground covers to fill in the gaps between your plants and flowers. They give the beds contrast while protecting the soil from the baking sun. Plus, they come in an array of textures and colors.
7. Living Fence – Dying for some privacy but just can’t build that fence between you and your neighbor right now? Create a living fence by adding layers of tall plants and bushes. You can also do this in front of an unsightly fence you can’t stand looking at every day.
8. Pollinators & Deterrents – Be sure to plant flowers that attract hummingbirds and bees. They love blooms with bull’s eyes in the middle, like bull’s eye tulips. Also, plant lots of flowers that deter aphids and mosquitos, like marigolds.
9. Raised Garden Beds – When you’re creating your sketch, don’t forget to add growing your own food to your landscape design plans. Install some raised beds in your yard. These hardscapes add visual appeal to the landscape while allowing you to feed your family organically.
Recent Articles