Table of Contents
The Ultimate DIY Irrigation System
This is a very cost-efficient DIY sprinkler system that will run you less than $300 to install. It’s very easy to build and needs very little maintenance once complete. It’s a very effective way to water your lawn and garden without having to do it by hand.
Such a system comes in very handy in areas where summer temperatures are generally above 100 degrees Fahrenheit. Here are some tips to help you get started:
DIY Watering System Timers
One of the best, simple to install hose-end sprinkler controllers on the market is the Orbit Watermaster. The cost is about $100 to transform your water hose faucet into an automatic sprinkler system with six independent stations and controls. It also allows you to program up to three different start times. According to my research, it’s one of the simplest to set up and program around.
The DIY garden watering timer kit comes with multiple valves so you can use more than one zone. If you’re anything like me, there are times when you may want to spot water using your hose. So, I suggest leaving one valve open for this purpose, or you can simply add a Y connector. You can also add a second timer to scale the system to include eight or more zones.
What makes these valves so much better than the ones that come with standard irrigation systems?
- Extremely simple to install
- Very inexpensive
- Little to no maintenance required
- Simple to disassemble during colder months
If you need something less complicated, just go with a single hose timer. This is what I use in my front yard to irrigate my flower bed. Next year, I plan to install an irrigation valve box to keep the components of my system safe from the outdoor elements.
I’ll also add some PVC piping along the edges of my walkway and use them to conceal the system. Then, I will bury the tubing and hoses in the ground to make the garden look more pleasing to the eyes.
Currently, our front lawn is barren. We literally share a portion of this space with our next-door neighbor. We’ve both agreed to leave our yards this way until we both decide what works best economically because it’s just too expensive to grow green grass in the hot desert Inland Empire of sunny Southern California.
The goal is to get a large load of free mulch through Chip Drop to layer across the entire area so our spaces look like one whole yard. Then, I will redesign the front garden beds to compliment the look of my side of the area.
That’s when I’ll add a secondary timer in the front and add a Y connector so the DIY watering system can take care of multiple beds to keep me from having to hand-water my crops. This will also allow me to use my water hose when needed for spot watering and other types of gardening tasks.
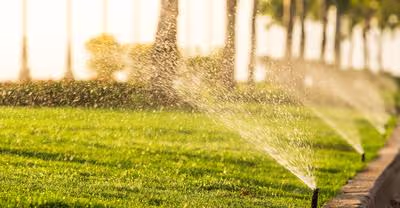
DIY Watering System Sprinklers
The types of sprinkler heads you install in your landscape should be based on its watering needs. Based on my research, one of the simplest systems to install is the Rain Bird Brass Impact Sprinklers. Here are six benefits of using this DIY sprinkler system:
- Installation – Very simple to install and adjust its infinite number of patterns
- Power – Long-range spray distance up to 41 feet which provides a lot of flexibility
- No Dig – No need to dig trenches throughout your landscape to install
- Materials – Last long because they are constructed using stainless steel, bronze and brass
- Efficient – Watering is down low to the ground, making it very water efficient
- No Clogging – Comes with a very large water discharge hole that’s hard to clog
You can mount the sprinkler to a stake or spike. This will give you panoramic, 360-degree watering coverage. Or place them on risers that are one foot tall or so and stabilize the system using metal stakes.
For information on how to adjust your DIY sprinkler heads to ensure you get the proper coverage, check out this video entitled, Adjust Orbit Metal Impact Sprinkler.
Adjustable Spray Heads
These work best in smaller areas or yards. They will run you just a few bucks to purchase. And they are even simpler to adjust when you install a riser and elevate them up on it. Many can be adjusted so they reach your lawn’s exact pattern for more precise landscape watering.
Here are some other benefits of adjustable spray heads:
- Single Nozzle
- Radius of 3-4 feet
- Variable Arc
Hose-End Sprinklers
Some yards have isolated areas or portions that are hard to reach. For these small areas, it’s best to install hose-end sprinklers. Select the one that’s best for your landscape based on the shape and size of the area to be watered so there’s no water runoff and waste.
Hose-end sprinklers allow you to install a DIY garden watering system without digging trenches in your landscape. These kits connect directly to any standard hose-bib so you can get water to the parts of your yard that need it the most.
DIY Watering System Supply Lines
Supply lines, also referred to as hoses and pipes, allow you to run water from your supply line to create an effective and efficient DIY irrigation system. There are numerous ways to run the supply lines, including using garden hoses and flexible Polyethylene (poly) piping.
Some people prefer using PVC. But there are some cons to using this rigid material for creating an irrigation system for your landscape:
- Flexibility – Polyethylene is more flexible than PVC piping, so it performs better during drastic weather changes such as freezing and thawing
- Adjustable – Glue is used to connect PVC pipes, making it complicated to change or tweak, whereas Polyethylene installed using hose clamps are fully adjustable
Landscaping experts suggest using poly piping that 1-inch in diameter for your main lines to ensure that water pressure is distributed evenly. Smaller sizes tend to send more pressure in one direction than another.
Here are the steps for connecting the poly pipe:
- Connect the piping
- Turn the water on
- Open each valve on at a time
- Flush each valve until the water is completely clear
- Seal with tape to keep the fitting clean until you install the actual sprinklers
Check out this video on How to Install In-Ground Sprinklers to learn more about connecting the poly to your sprinkler supply lines.
DIY Watering Systems: Pressure & Flow
Low water pressure causes your irrigation system to lose efficiency because some of the sprinkler heads may fail to pop up from the ground when turned on. Also, you want a uniform spray pattern so every area of the landscape that needs water gets an adequate amount. If not, you will need to run the system longer than necessary to reach certain areas.
Having high water pressure is no better and comes with its own set of problems. Other problems come with this issue, such as:
- Damage – The system could become damaged or break altogether. Think of it as putting too much air into a balloon and continue to fill it until it pops.
- Inefficient – Instead of large water droplets coming from the nozzle, you get a fine mist. This mist quickly evaporates into the air before it has a chance to reach the garden, leading to a loss in irrigation efficiency.
Most homes have an average water pressure of 30 PSI to 50 PSI. But most sprinkler systems use about 30 PSI in pressure. You should determine the PSI at your home before installing your DIY watering system by attaching a water gauge directly to your outdoor faucet.
While running the water pressure test, ensure that no water is running on the property, either outside or inside. If your pressure is much higher than the norm, you may need to install a water pressure regulator.
You can also determine your home’s pressure flow by simply using a 5-gallon bucket. Use a timer to calculate how long it takes to completely fill the bucket with water using an outside faucet. This number allows you to calculate your GPM or gallons per minute.
4 Tips for Planning Your Sprinkling System Design
Your DIY garden watering system design should look aesthetically pleasing while ensuring that every element in the landscape that needs water gets it. Here are four tips to design your system so it’s both efficient and effective:
1. Measure the Lot
Get the measurements for your lot. You can get this information from your city or county public records department or by using Google Earth or Google Maps.
2. Divide the Lot
Now, create chunks by dividing up the lot based on your home’s water capacity and the type of sprinkler heads you’re installing.
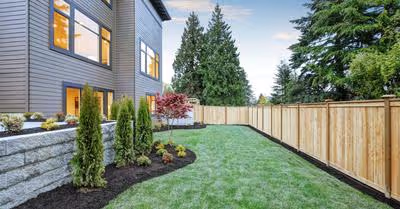
3. Use a Perimeter
Run your main water supply lines along something long, such as a straight pathway, fence or even your house. This allows you to install a no-dig system so you never have to worry about running over or somehow tripping over your sprinkler heads.
4. Install Auto-Drains
At your supply lines’ lower spots, install inline automatic sprinkler drains, which generally costs just a few bucks. When the pressure is off, these devices drain water from the lines automatically.
Why Your Home Needs an Automatic Sprinkler System
An automatic sprinkler system is one of the best things you can do for your landscape to keep your lawn green and your flowers, plants, trees and shrubbery healthy. It helps ensure water always gets to the areas where it’s needed most while helping to prevent underwatering and overwatering.
Plus, this ensures everything gets watered even if you oversleep, are too tired to hand water are out of town on a vacation.
Hand watering is time-consuming. It can also be unbearable in areas where temperatures are extreme, such as here in the SoCal Inland Empire, where summer days can reach up to 115 degrees Fahrenheit.
And because we tend to have droughts during the summer months, watering needs to be efficient to avoid waste. These systems help conserve water by avoiding overflows while uniformly irrigating the landscape. Watering by hand can lead to a 50% loss of water due to evaporation and runoff.
6 Benefits of Automatic Irrigation Systems
Automatic watering systems include timers that are programmed by you to run as you see fit. Set it for early in the morning to ensure your plants are ready for the day’s heat. Or in areas where there are watering restrictions, you can program it to run only during the nighttime to stay in tune with regulations.
This is not only beneficial to you and your landscape. But it’s an environmentally friendly way to irrigate your landscape while doing your part to conserve water. Here are six benefits of automatic irrigation systems at-a-glance:
1. Conserves Water
Even if you choose to use a DIY watering system made up of soaker hoses, PVC piping or other materials, you’ll notice a great amount of water conservation when compared to watering by hand. But automatic systems are even more efficient because every drop of your water is used efficiently and none of it goes to waste.
These watering systems can save you anywhere from 30% to 50% in water costs. This is something conventional watering methods simply cannot offer.
2. Increases Growth
Hand watering essentially provides lawns and crops with quick bursts of water that may or may not be efficient. However, auto-watering systems provide small amounts of irrigation over a longer period of time.
This creates the ideal conditions needed for greenery to thrive. You’ll be amazed by how much lusher your lawn is and how much faster your plants grow.
3. Preserves Nutrients
Overwatering can lead to water runoff which strips the soil of valuable nutrients plants need to thrive. Also, oversaturated soil can become compacted around the roots of the plants, which can crush or suffocate them and cause root disease. Using a lawn irrigation system allows a specific amount of water to flow to reach various areas of the landscape without damaging the ecosystem of the soil.
Underwatering, on the other hand, can also lead to issues that damage the soil. Dried-out soil is susceptible to erosion. It can also transform into a dusty-like substance that tends to blow away when the wind blows, carrying away valuable nutrients in the process. Automatic DIY garden watering systems help avoid these issues.
4. Saves Money
When installed and programmed properly, an automatic irrigation system ensures that water is never wasted, which saves you money overall. Good systems come with rain sensors. So, on rainy days, they don’t activate. This also saves you money by allowing your landscape to get its irrigation from the skies above instead of your home’s water supply.
5. Saves Time
Installing an irrigation system with a programmed timer allows you to spend your time weeding, sowing seeds, planting new starts and other gardening tasks while the system does the watering for you.
If you live in an area where it gets really hot, set the timer for an optimal time of the day, such as right before dawn or just after the sun sets. This also allows you to take that long-needed vacation you’ve been promising yourself without worrying about garden irrigation issues while you’re gone.
6. Improves Home Value
Keeping your front lawn green, trees happy and other plants healthy adds to your home’s curb appeal, which always improves the overall value of the home. If you’re thinking about selling, this could be an outstanding selling point for your potential buyers.
And even if you’re not, just think of how much happier you’ll be pulling into a driveway next to a nice, lush landscape. Automatic irrigation systems help you achieve that.
Recent Articles