Table of Contents
Step-By-Step Guide to Building a Wood Garden Gazebo from Scratch
Please note that you must install your foundation before building your gazebo. However, I know you came here for this guide specifically. So, we’ll start there.
The easiest way to make a garden gazebo is by using a prefabricated kit. However, these DIY gazebo kits can run about $3,000. You can cut costs by building your own wood gazebo from scratch and still have it come out looking like it was installed by a professional.
You may need a little assistance to get the job done right. But you can do this if you believe you can. Just follow these step-by-step instructions to build a wooden gazebo for about one-third the price of using a DIY gazebo kit.
Step 1: Build the Walls
For the four corners, you need four large posts. Choose the size of your choice. But commonly the measurements chosen are 12 feet (length), four inches (height), four inches (width).
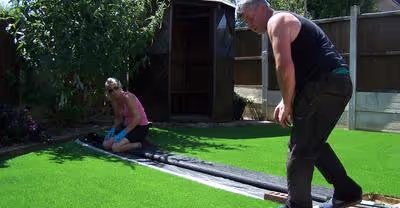
- Mark out the area where you want the hardscape located. Eight feet by eight feet is highly recommended. Use a post hole digger to dig holes for your four large posts.
- Make sure your posts are level in the holes. They should be eight feet apart and eight feet above the ground.
- Anchor them in place using quick cement ensuring that they are all the same height and stay straight. Only fill the holes about 2/3 around the posts with the quick cement. Once the cement sets, cover the other 1/3 of the holes using dirt.
Step 2: Mount Your Beams
Grab six more of your beams and use them to brace the gazebo’s three closed sides. Place two on each side, vertically to the posts two inches from the bottom and top. Use two large bolts to secure the beams by placing them through the post and each beam’s center.
- Pre-drill holes in the posts for your bolts.
- Have your assistant hold the beam in place while you attach the bolts in place.
- If you’re adding windows to the gazebo, measure them and add 1.5 inches, making this the distance between the beams.
Step 3: Install the Windows
Fit the salvaged glass windows and wood centered within the three walls. Measure their width. Use one-inch by four-inch boards to create a window frame and nail it in place. Then, use nails to affix the window where you want it.
- Hammer in the nails as close to the window as possible to keep it stable. Use three or four mails for each side, making sure they stick up about ¼ inch.
- Use caulk or wood glue to seal around the window (optional).
Step 4: Cut Beams
Now, it’s time to cut your upper beams. Grab four more beams that are about 8 feet by seven inches. Cut squares into one side of each beam that measures 2.5 inches by 3.5 inches by ¾ inch.
- Fit the pieces in place as if they were puzzle pieces using these cuts.
- Fit the two indented ends together as well, making a half-lap splice joint.
Step 5: Attach Beams
To attach the upper beams:
- Glue the beams together.
- Connect the beams to the top of the posts by placing a bolt or two into the posts through the square.
Step 6: Build the Roof
Grab five more beams:
- Four should measure 1-inch by six feet.
- One should measure seven inches by eight feet.
- On one end of each one of the four six-foot beams, make a 45-degree angle cut.
Step 7: Bolt Beams Together
Using bolts, attach the flat sides of each short beam to the longer beam at each of the four corners:
- Create two triangles by joining the 8-foot by seven-inch beam between them.
- Make sure the bolts are no less than one inch apart.
Step 8: Attach Beams to Roof
Have your assistant hold the roof of the gazebo in place while you both each corner of it to the corner posts:
- Note: Your bolts should be long enough to go into the posts but not so long that they stick out of the other side.
How to Make Your Garden Gazebo Look Awesome
Now, it’s time to add some finishing touches to improve the look and functionality of your garden gazebo:
Step 1: Paint Your Gazebo
One of the simplest things you can do to spruce up the look of your wood gazebo is adding a fresh coat of paint. You can paint it to match your home or add a splash of bold colors to create an accent piece for your landscape.
Be sure to use outdoor paint. This will ensure that it lasts longer throughout the seasons while protecting and prolonging the wood’s life.
Step 2: Cover the Roof
Give your wood gazebo a unique look with a fiberglass or grooved aluminum roof. Use nails to secure it in place. Get even more creative and screw some awesome-looking hooks inside your angled roof beams. They should be about one inch from the bottom and top of each one.
Step 3: Build Movable Walls
Add some complimenting curtains inside the hardscape to act as walls. Just hang them on curtain rods and affix the rods to the tops of the structure so the curtains drape down when closed. Whenever you want a more open feel, just open the drapes and enjoy the view.
Step 4: Add Amenities
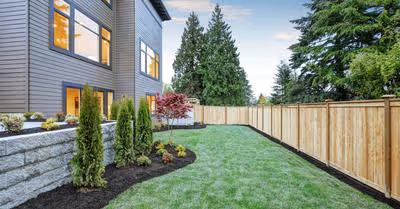
Now, it’s time to have some fun decorating your new DIY garden gazebo. Give it your own personal touches with hanging flower pots, window boxes, solar garden lights, a table and chairs, hammock, a small water feature or a bed. Your gazebo can be both functional and aesthetically pleasing with the right hardscapes and softscapes added to it.
Building a Base for Your DIY Gazebo
Really want to take the look and feel of your gazebo up another notch? Why not add a base to your structure, such as a concrete foundation? Here are the steps to building a gazebo base and tips on how to choose the best base for your gazebo:
Step 1: Clear & Level the Area
Clean up the area where you plan to build your gazebo base. Make sure there’s no debris, weeds, rocks, grass, plant or tree roots. Clear a path no less than four feet from the perimeter of your future foundation.
For example, if your gazebo is 10 feet by 10 feet, which equals 100 square feet, make the center point of the foundation the middle of that 100-square-foot area.
Step 2: Level the Area
Fill all holes within the area to level the ground. Use compacted soil to get the job done. If the location has many holes or is very uneven, you may want to call your assistant in again to help.
Step 3: Outline the Foundation Area
Now, it’s time to outline the area where you plan to build the gazebo base. Whether you’ve chosen to build a wood deck, concrete slab, brick paver patio stone or concrete footing foundation, this step is a must.
Use stakes to mark the four corners (for square bases) of your base. Then, tie strings around each stake, connecting them together to create a square. This marks the perimeter where you need to install the foundation you’ve chosen.
4 Different Types of Gazebo Bases
There are a variety of gazebo foundations that are both aesthetically pleasing and functional. What you choose may depend on how much back-breaking work you want to put into the DIY project, how much you want to spend or both.
A solid, strong gazebo base provides a quality structure to help keep your hardscapes intact for decades. Today, we’re discussing wood bases, patio stone bases, concrete slab bases and concrete footing bases. No matter which one you choose, you are adding a true foundation that will add years to the life of your gazebo.
Not sure which type of gazebo foundation is best for your needs? Well, here are three popular choices installed by DIY property owners:
Type 1: Wood Deck Gazebo Base
A wooden deck will not only match your wood gazebo, but it will give the hardscape an organically appealing look. It’s a very cost-efficient way to build custom flooring for your gazebo.
How to Install a Wooden Deck Gazebo Foundation
Tip: It’s recommended that you use materials that can withstand many weather conditions, such as pressure-treated lumber or cedar.
- Build a sturdy frame using wood beams, creating a perimeter around the gazebo itself
- Construct the flooring of the beams the same way you would lay planks for a deck on the perimeter
- Stain and seal the wood and give it enough time to dry before installing your gazebo
- Now, go ahead and use the guide above to make a garden gazebo on top of your wooden gazebo base
Type 2: Brick Paver Patio Stones Gazebo Base
Brick pavers make great foundations for gazebos in areas where there’s good drainage. After much research, I recommend pavers that are at least two inches thick and 12 inches by 24 inches in size.
You can also get super creative and use uniquely shaped patio stones. However, this DIY project won’t be as simple.
How to Install a Patio Pavers Stones Gazebo Foundation
- Mark off the perimeter where you want your foundation
- Lay cardboard or weed fabric to suppress any grass or weeds that may exist or emerge
- To make the area more stable, lay crushed rock or gravel within the perimeter
- Add edge restraints around the perimeter of the area to keep the pavers in place
- Lay the patio pavers down on top of the area in a uniform manner
- Pour stone dust on top and sweep it in between the cracks and crevices of the pavers
- Moisten the area and repeat the step above to create an extra barrier against grass and weeds
Type 3: Concrete Slab Gazebo Base
When maintained properly, a concrete slab foundation will remain durable for decades. This is the most commonly recommended material for foundations because of its endurance and strength.
Make sure you give your concrete about 7-10 days to completely dry before installing your DIY gazebo on top of it. And keep in mind that this is grueling work. So, you may want to call your assistant to help you with this.
Tips for Laying a Concrete Slab Gazebo Foundation
- Lay four inches of crushed rock or gravel on the area within the base perimeter
- Pour the concrete slab on top so its three to four inches in thickness
- Expect to use one cubic yard of premixed concrete for every 80 square feet
How to Install a Concrete Slab Gazebo Foundation
- Build the frame around the perimeter using two-by-four wood
- Dig up the area within the perimeter to a six-inch depth
- Fill the entire area with four inches of crushed rock or gravel
- Using the guidelines on the packaging, mix up your concrete
- Pour the concrete in and on the rock or gravel
- Screed the concrete to smooth it out and make it level
- Allow the gazebo’s concrete foundation to dry for seven to ten days
Type 4: Concrete Footings Gazebo Base
Love the look of concrete but laying a concrete slab is just not an option? A concrete footing just may be the best choice for you. This is the ideal gazebo foundation hardscape material when you don’t want to deal with getting a building permit or your ground is sloped or very uneven.
A footing allows you to raise your gazebo up off the ground, making it completely stable in uneven or inclined areas. They are also an excellent option for leveled areas where you just don’t want to install a concrete slab.
How to Install a Concrete Footings Gazebo Foundation
- Contact your utility and cable companies or Call Before You Dig to ensure that no underground lines are running where you want to excavate for your footings
- Mark off the area where you want to raise the gazebo to build your base
- Dig the posts to the desired length
- Fill the holes of the posts with rebar and concrete
- Allow seven to ten days for your concrete to completely dry
- Install your wood gazebo using the step-by-step guide above
Recent Articles