Table of Contents
Step-by-Step Guide on How to Lay Pavers on Dirt
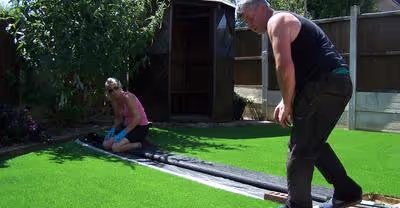
Looking for a low-cost, simple way to add some pizazz to your yard? Patio pavers will do the trick. The key is making sure the ground you’re working on is completely clear. That includes the grass, weeds and everything else in the area. It also needs to be leveled.
These eight simple steps will walk you through how to lay pavers directly on the dirt in your yard:
1. Remove All the Grass
Experts suggest removing grass, weeds and other foliage using a spade. Dig really deep into the ground to ensure that you remove the entire root system, not just the foliage on top. If any roots are left behind, they just may regrow and come up in between your patio pavers.
However, I believe in the ‘no-till gardening’ method for suppressing weeds. Tilling destroys the overall quality of your soil. And even though you’re installing pavers in this spot, as opposed to growing your own foods, you still don’t want to destroy your soil just in case you want to grow there later.
Getting rid of grass, weeds and other foliage using the no-till method takes a little extra time. But it’s well worth it. Get yourself a boatload of cardboard. Then, place layers of it in the area where you wish to lay the pavers.
Water the cardboard well. This helps to start the breakdown process while helping to keep the cardboard in place. Use rocks or something heavy to secure it more. The foliage should be gone within a couple of weeks.
No matter which method you choose, do not toss all that grass you removed. Instead, transplant it to other areas, use it as a mulch for your plants or put it in your compost bin.
2. Level the Ground
Your ground must be leveled if you want your pavers to line up properly. One way to do this is to use clean fill dirt that doesn’t contain large debris, organic matter or toxins.
Some people have been known to use topsoil for this. But this is a bad idea because topsoil contains some organic matter. Over time, it will break down, which will make your soil and your pavers unleveled and uneven.
That’s why it’s good to get fill dirt from your local contractor. Make sure the dirt has been certified to not contain large debris, toxins or organic matter.
3. Mark the Vicinity
Place markers around the area you plan to work with using stakes. Now, you have to decide to what height you want to level the ground. It’s much easier to level up than down because lowering the level requires digging. Raising the level just requires adding more dirt.
Once you make this decision, mark the spot by pinning a marker on a nearby wall, fence or whatever you have. You can also use chalk. Start adding the fill dirt and continue doing so until it reaches that height.
4. Compact the Dirt
Pack the dirt down. The easiest method I’ve found for this is to place a board on the dirt and walk on it, moving it around until you’ve packed the entire area.
This may cause the level to be a bit lower than you want. Just add more dirt and compact it again until you reach the height you desire. The more compact the dirt, the steadier it will be when you lay your pavers down on it.
5. Lay Geotextile Fabric Down
Many people lay down landscaping fabric at this point. But, personally, I can’t stand the stuff. It’s not very effective for keeping weeds at bay. Plus, it tends to deteriorate over time, leaving tiny pieces of landscape fabric in your dirt. And that’s not good because it’s not biodegradable.
Professional landscapers recommend using geotextile fabric instead. Use spikes to keep the edges from showing. Using geotextile fabric helps to:
- Keep the dirt firm
- Improve drainage
- Stop weeds from popping up between the pavers
6. Install Edge Restraints
Place metal or wooden edge restraints all along the edges of the area. Use 9-inch nail spikes to fasten them into place. The nails will drive right through the holes of the edge restraints and into the soil.
7. Lay the Pavers
Now, this is where your creativity comes into play. There are no rules when it comes to how to lay pavers on dirt. You can choose any type of pattern your heart desires. Just make sure that each one is flush against the ones it's touching. They should be as close together as possible.
Here are the steps to laying patio pavers directly on your dirt:
- Place the first paver in a corner of the area
- Work your way across until a small section is complete
- Lay a board on top of the pavers
- Use a hammer to hit the board and embed them into the dirt
- Ensure that the pavers are level
- Continue completing small sections until you are done
8. Pour Stone Dust
Pour stone dust onto the patio pavers. Use your hands or some type of hand tool to push the dust in between all of the little crevices in small sections at a time. Moisten the area and continue this pattern until all the pavers have stone dust in between them.
What does stone dust do when placing pavers on dirt?
- Acts as an extra deterrent for weeds
- Helps fill in the small cracks and crevices between each brick
2 Alternatives to Laying Patio Pavers on Dirt
During my research, I came across a couple of alternatives to laying your pavers directly onto your dirt. Both of these options provide the same functions as pavers. Yet, they come in a variety of colors and styles, although they are more expensive than traditional paver bricks.
1. Portable Outdoor Patio Tile
Portable Outdoor Patio Tiles are a stylish option if you don’t want to lay pavers on dirt. These tiles can be installed directly onto:
- Concrete
- Gravel
- Pavement
- Sand
- Grass
- Dirt
These tiles feature a non-slip surface. Plus, they dry very quickly after installation and they stay secure even after heavy rain. They are constructed using polypropylene, which is a very sturdy material. The tiles are great for DIY outdoor tile projects because the tiles simply snap together.
To clean them, simply mop them with the floor detergent you usually use to clean the floors inside your home. When cleaned regularly, they help fight against mold and mildew.
2. Stay Lock Perforated Tile
Stay Lock Perforated Tile also has a non-slip surface. The tiles are oil-resistant, waterproof and provide superb drainage. They are manufactured right here in the US.
These tiles come with a connector system that locks each one in place. Install them directly onto the dirt and clean them by mopping with a vinegar and water solution.
When installed, the tiles seem to float above the ground because they provide a slight cushion. And they won’t separate from each other, making them a versatile option for outdoor flooring.
Do I Need Gravel Before Laying Tile Pavers?
It’s not necessary to lay gravel in your dirt before installing paver bricks, as long as the dirt is level. However, gravel bases are great for supporting patio pavers. They improve drainage by allowing moisture to pass through and into the dirt.
Gravel also helps to keep the bricks from sinking by absorbing tension caused by walking on them. Plus, they look great in your garden.
Here are the steps to installing gravel before placing your pavers in the area:
- Use markers to outline the area you plan to pave
- Clean the area (follow step one in the step-by-step guide)
- Tamp down on the gravel as you add it to the area
- Keep adding it until you reach the level you prefer
- Place edge restraints are the area
- Pour sand all over the gravel
- Lay your pavers on top of the rocks
Recent Articles